Setting up church sound isn’t just about addressing the preacher’s voice to the back pews.
It’s all about transforming a worship experience to a new level of spirituality. No matter if it’s a soft hymn or the most exultant anthem, the sound quality can make or break the worship experience.
In this church sound setup guide, let me walk you through every step of this process, from choosing the right audio equipment to setting up the acoustics.
Whether you’re an audio engineer or a novice, this guide is equally beneficial to you.
So, without wasting any more time let’s jump into this.
Table of Contents
Church Acoustics
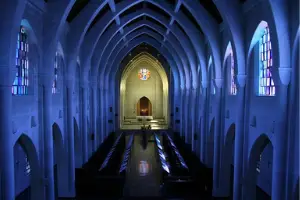
Room Acoustics plays a crucial role in the quality of audio you are recording or playing. And when it comes to churches where reverberation is the main disadvantage, a good acoustic treatment is essential.
Church or Cathedrals are well known for their reverberation. Even in most of the reverb effects plugins you will get a priest named Cathedral.
To get the best output in our sound setup, we have to minimize this effect in the church.
Disclosure: This post may contain affiliate links, which means we may receive a commission if you click a link and purchase something that we recommended. Read more about Affiliate disclosure here.
So, how would you do that?
First off,
Room Size and Shape
The size and shape of the room is a very important factor in room acoustics. In churches, there are two types of sound applications.
- A dedicated room for audio recording sessions
- The main hall sound
For recording sessions, you can use a control room of 16×10 or equivalent. The shape should be rectangular as the ordinary room. You also need a separate sound booth for recording vocals.
And if you record choruses which are an integral part of worship songs, you need a chorus room that should be big enough for the chorus crew.
You cannot do anything about the main hall’s shape and size. So we need to put some acoustic arrangements if applicable to your church’s main hall.
Materials Required For Acoustic Treatment
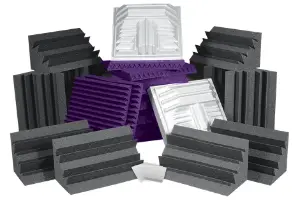
When it comes to soundproofing and acoustic treatment materials, there are multiple choices in which we have to choose the best fit.
Here are the main components of acoustic treatment materials.
- Bass Traps: Bass traps absorb low frequency sounds especially used in room corners.
- Acoustic Panels: These panels are used to mitigate mid and high-frequency reflections.
- Diffuser Panels: Diffuser panels scatter sound waves to create a balanced acoustic environment.
- Acoustic Foam: Acoustic foam is used in some areas of the room to reduce mid and low-range reflections.
- Fiberglass Insulation: Fiberglass is the ultimate solution to absorb all types of sound reflections. It is often used in wall and ceiling cavities. You can use fiberglass inside the false ceiling and wall structures of your church cathedral.
- Perforated Plywood: Plywood is one of the cheapest soundproofing materials that you can use in false ceilings and walls.
To use these materials you must know how and where to use them in your control room, sound booth, chorus room and cathedral.
I have written multiple contents on this. Read them and you will be on your own way to setup the right acoustic treatment for your church.
- The Ultimate Guide To Acoustic Treatment For Home Studios
- How To Make Your Home Studio Sound Professional
- How to Get Rid of Low Frequency Reflection in Rooms
- How to Build a Floating Floor for a Recording Studio?
How to Manage Reverberation for Clear Audio?
When sound is reflected through a surface, reverberation occurs. Reverberation is the mix of the original sound and the reflections.
It contains the pre-delay, head, and tail of the reflection, etc.
Big rooms and halls cause more reverberations due to more delay between the original sound and reflection.
We can minimize reverberation by using Sound-Absorbing Materials such as acoustic panels or foam on wall surfaces which will absorb and scatter the sound. Bass traps, diffusers, and absorbers are also used to control reverberation.
To control reverberation in a large room or hall we have to first identify the corners where sound energy is stored and use the acoustic treatment on these corners.
We can use SPL meter to identify these corners. SPL meters measure the sound pressure level at a particular area in the room.
Now let’s list down the essential audio equipment required in a church sound setup.
Essential Sound Equipment
Setting up a good quality sound system for a church requires different essential equipment. Here is the list of all the necessary equipment required for the church sound setup.
Best Microphones Types for Church Sound
There are 2 types of mics used for sound applications.
- Condenser Microphone
- Dynamic Microphone
Condenser mics are very sensitive mics that are generally used in recording studios for vocal purposes.
If you are setting up a recording studio within your church to record worship songs then you need these microphones.
I have a great comparison post where you can choose the best condenser mics for your church recording studio.
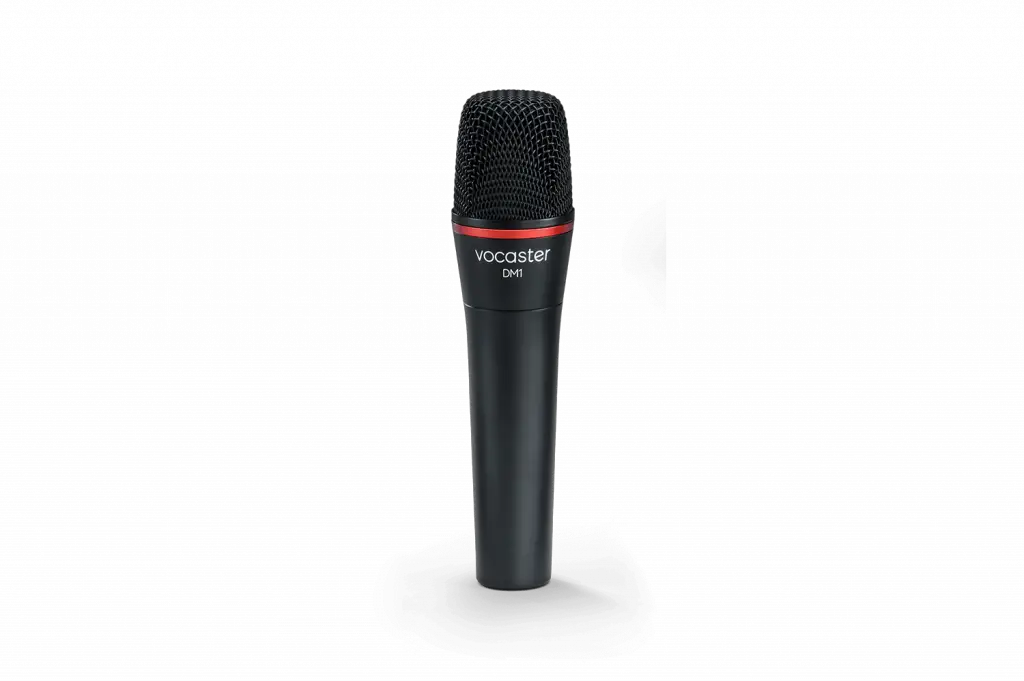
Another type of microphone, “Dynamic Microphone” is used in live sound setup. It is less sensitive to background noise that’s why it is used in live sound.
You can use this mic type as a part of live addressing system of your church sound setup. This ultimate guide to live sound setup will give you more insight into choosing the best dynamic mics for live sound setup.
Right Mic Placement
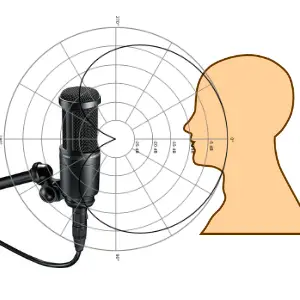
Buying the right mics is not just enough. You have to know how to use them properly. You should know the right mic placement to record clear audio for post-production or in the live sound.
- First off do not use condenser mics in live programs. Dynamic mics are less sensitive hence they do not catch the background noise.
- In the recording session, you may use a combination of condenser and dynamic mics. Condenser for vocals, acoustic guitars etc, and dynamic for rhythmic instruments like drums.
- Always place the condenser mic 15 cm away from the sound source and if you are using it for vocals then also use a pop filter to reduce the direct popping effect of the mouth.
- For dynamic mics, the vocalist and instrument players should maintain an optimum distance according to sound amplification. But ask him/her not to put the mic at a long distance, otherwise, the mic may catch the background noise and you will listen to a LOOP sound.
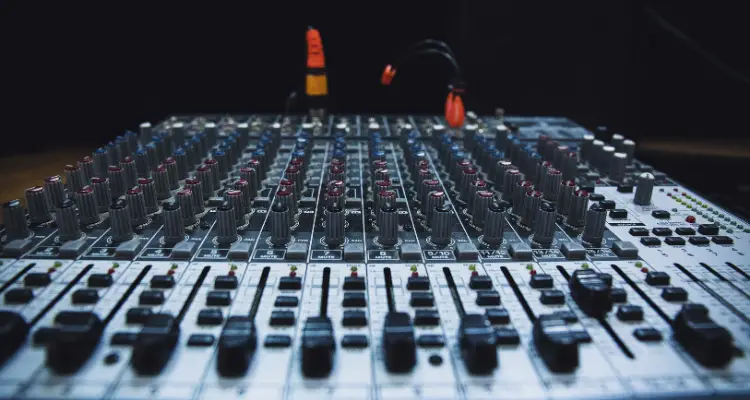
Mixing Consoles
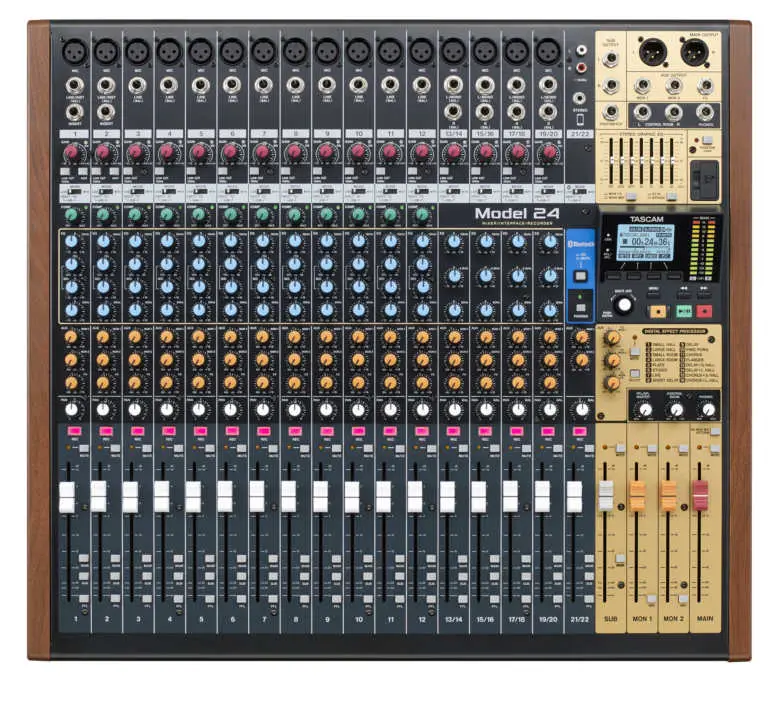
Mixing consoles are of 2 types.
- Analog mixing consoles
- Digital mixing consoles
There are no big differences between the analog and digital mixing consoles expect the interface. In analog mixing consoles, you have to control all things manually.
In digital mixing consoles, you will get a digital screen and digital controls. You can make scenes and use them in the future, save effects for separate channels for future use create and save presets, and route the signal digitally with the help of the LCD screen and given software.
You will also get ADAT optical ins/outs to connect with an ADAT audio interface and other digital mixers. You can choose the sample rate and bit depth in the digital mixers to enhance the clarity and quality of the sound.
So, digital mixers are great for any type of audio application today. I have written a great comparison post on 9 Best Digital Mixers For Church that will help you to choose a digital mixer for your church.
Amplifiers
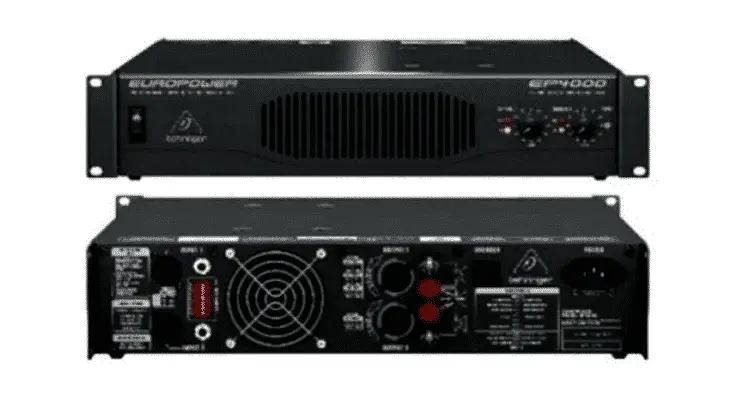
When it comes to live sound setup, amplifiers are an integral part of it. Without amplifiers, you cannot amplify the sound and address the audience.
There are several types of amplifiers out there in devices with different wattage, brand and sound quality.
There are no hard and fast rules to choose amplifiers for church sound. But you must keep in mind that the wattage of the amplifier should be double the combined wattage of your speakers.
For example, if you have 2 cabinets of 1000 watts then you should go for at least 4000 watts amplifier.
If you get a lower wattage amplifier then you would listen to a distortion in the sound due to low wattage supply. Also, keep in mind, don’t overvolume the amplifier as it can damage the speaker drivers.
You can get help from this blog post to choose the best amplifier for your church.
Speakers

There is no sound system without speakers. There are different types of speakers used for different purposes.
Such as, for recording studios active studio monitors are the first choice whereas for live sound passive speaker cabinets are common.
If you are setting up a recording studio in your church to record and mix worship songs and speeches then you must have a set of good active studio monitors. Read this guide to choose one for your church studio.
For the church addressing system, you can use a combination of wall-mounted speakers, main speakers, subwoofers, and monitor (feedback) speakers.
- Main speakers and subwoofers are used at the front of the stage to cover the whole audience from the front side.
- Monitor speakers are used to feed the artists and spokesperson over the stage.
- Wall-mounted speakers are used to fill the dead spots in between the audience. They are generally mounted on the side walls to cover a specific part of the audience.
I would recommend using separate amplifiers for subs, main speakers, and wall-mounted speakers. for stage monitors you can use powered speaker sets as I use in our college sound system.
I purchased 2 Dynacord amplifiers, one for main speakers and subwoofers, and the second one for wall-mounted speakers. I also purchased 2 powered monitors from OSL company for stage monitoring purposes.
The main and wall-mounted speakers are Electro-Voice ELX200, the Subwoofers are Electro-Voice ELX200-18SP and the stage monitors are OSL.
Audio Interface

If you are setting up. recording studio in your church to record worship songs then you need an audio interface.
It is a hub between the mics and instruments to the computer. Without an audio interface, you can’t record anything on the computer. You also need a DAW or digital audio workstation software to record multiple tracks and mix them.
Choosing a good audio interface is not easy. You need some basic knowledge of audio to compare audio interfaces such as frequency response, input and output types, preamps, noise floor, sample rate etc.
Are you confused about all these things? Well, don’t worry, I have written a whole bunch of blog posts about choosing the best audio interfaces and compared many of these.
Read them,
- How Does an Audio Interface Work? [Explained]
- How To Choose Audio Interfaces in 2024 [Ultimate Guide]
- Top 10 Best Audio Interfaces Under $1000 [2024 Editions]
Computer
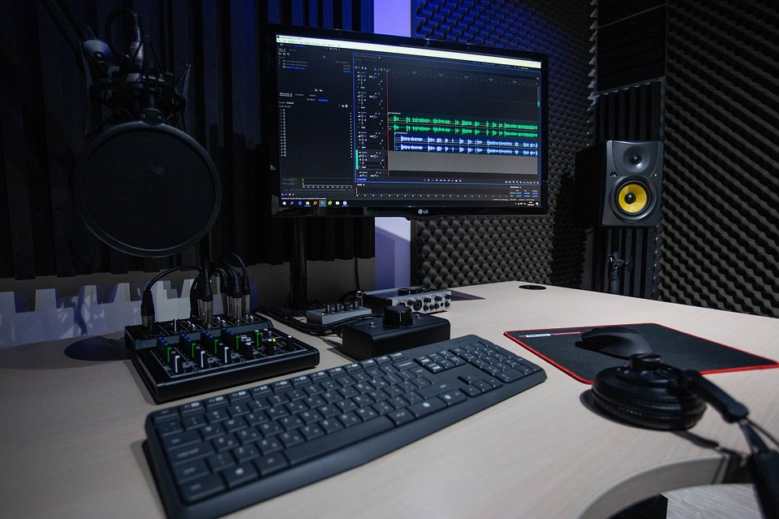
Now come to the computer for audio recording. It is another essential piece of equipment for digital audio recording.
And, choosing the best computer configuration for your audio-related work is also a bit techy. You need the knowledge of computer components and their usage is audio recording to get the best one for you.
Hopefully, I have written a whole guide on choosing an audio recording computer which you can refer to build a good computer for your church.
Essential Audio Cables
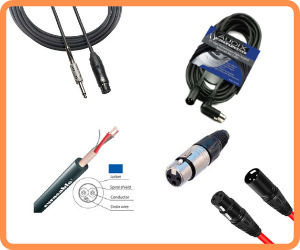
When it comes to live sound and recording studios, there are tons of cables out there. Let me give you a list of some essential cable types used for these purposes.
- Power cables
- XLR cables (for mics)
- TRS cables ( for instruments)
- Balanced TRS and XLR cables (for studio monitors)
- ADAT Optical cable (to connect an audio interface and other devices to a digital mixer)
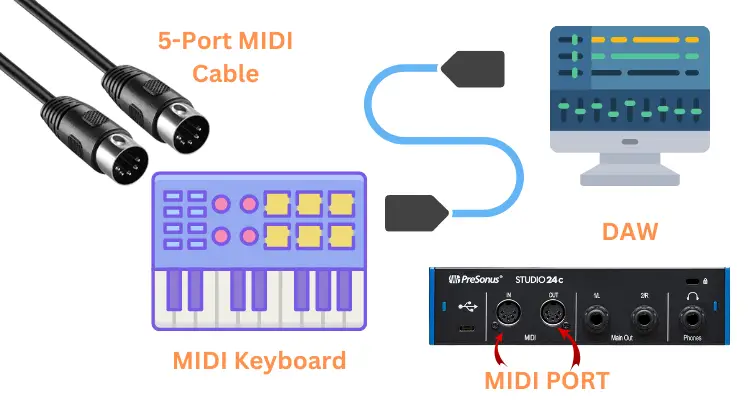
- Midi Cables (for Midi instruments)
- Speakon (to connect live sound speakers with amplifiers)
So, these are some important cable types you should know about. I have mentioned the use cases with all the cable types that will guide you in choosing the right cable for an application. You can Google about them for more information.
Other Accessories
Other accessories include,
- Pop filters (Used with condenser mics to avoid popping in vocals)
- Mic stands
- Studio and live sound tables (checkout this guide)
- Protective cases for amplifiers and mixers
- Snake cable (to connect mixer and amplifiers to stage arrangements – this includes multiple types of cables)
These are some other accessories needed to build a good church sound setup. Some are essential and some of them are not necessary. It all depends on your usage and which ones are essential to you.
Now let’s jump to the next section where we’ll discuss about church sound connection guide.
Church Sound Connection Guide
I have mentioned all the important audio cables required for the church sound setup above.
For connections, we can divide church sound into two parts.
- Live sound setup (PA system)
- Recording studio sound setup
Whether it’s a live sound or studio setup, first, connect the amplifiers/audio interface to the mixer and speakers, and then connect the instruments and mics to the mixer.
You should always setup the routing with the help of the reader’s manual given with the mixer. You can also get help from YouTube videos to properly route the mixer with mics, instruments and amplifiers.
Note: Always last on and first off the amplifiers. Otherwise, speakers may be damaged due to surge.
When first setting up the connections you must take a photo of all the connections for future reference. So that if the connections are reinstalled you may connect them properly.
Live Mixing and Processing Techniques for Church Sound
You can achieve the best sound mix with the help of these factors.
- Signal Clarity: You should use equalization and dynamic processing to enhance the clarity of the sound.
- Gain Staging: Gain staging is one of the most important steps in audio mixing. Set appropriate fader levels, avoid distortion, and ensure a clean signal path towards the speakers.
- Monitor Mixes: Monitors are crucial for the performers and the mixing engineer. So mix the monitor sound by properly equalizing and adding dynamics.
Here are some important frequencies according to the instruments that you can reference for clean and distortion-free music.
- 60hz to 80hz: Kick drum (pulse)
- 125kz: Kick drum (Punch)
- 4khz to 8khz: Kick drum click or snap
- 80hz to 200hz: Bass guitar
- 100hz and below: loud puffs and pops on vocals (You should cut these out with the help of EQ or high pass filters)
- 250hz: Low vocals
- 200hz: Snare drum
- 400hz to 500hz: Roomy overtones that you should remove from toms or snare drums
- 1khz to 4khz: Pop of a snare drum
- 12khz to 16khz: Drum overheads
Maintenance and Troubleshooting
Maintaining and troubleshooting a church sound setup is important to ensure long-lasting and trouble-free sound equipment.
A well-maintained sound system provides clear PA and music, that enhance the worship environment. So, you should regularly maintain and troubleshoot the setup if required.
Maintenance involves,
- Routine checks
- Cleaning
- Ensuring all components are in optimal condition.
- Regularly inspecting cables, speakers, amplifiers, connectors, microphones, and mixers
- Cleaning dust and debris from equipment
- Checking for loose connections
TO troubleshoot the setup you should know about the common sound problems, such as feedback, distortion, or signal dropouts, that can disrupt worship experiences. You must understand signal flow, equipment settings, and potential interference sources.
Conclusion
So, this is the detailed guide to sound setup for church sound. If you are going to buy and set up worship sound then this guide will definitely help you with that.
Setting up church sound is not so hard if you know the basics of professional audio. I have setup a PA system for a college and all the things have gone smoothly with me.
PA systems are the same for churches, colleges, schools etc with just minor changes.
This guide has covered all the important things that you need to know for setting up church sound.
FAQs
Why does sound quality important in a church sound?
Clear sound ensures sermons, music, and spoken words are clearly audible and impactful to the congregation. That’s why sound quality is important in a church sound.
Are wireless systems helpful in church sound systems?
Yes, absolutely. In fact, wireless mics and other things make it quite easy to connect and manage the sound system. This removes the use of wired connections.
How can I adapt the best sound setup for different church events?
If you have a digital mixer then you can create and save different presets and scenes for different purposes. These presets include EQ settings, dynamics, bus and aux settings.
Why do you need to provide training for church sound operators and volunteers?
Operating a PA system or studio sound requires specialty knowledge in sound recording. However, you can provide basic guidance to the church sound operators and volunteers for operating the mixer, amplifiers audio interfaces and speakers.
Related,
![Top 9 Best Amps for Blues [2024]](https://www.recordingbase.com/wp-content/uploads/2023/12/best-amps-for-blues.png)
![9 Best Digital Mixers For Church [2024]](https://www.recordingbase.com/wp-content/uploads/2023/07/Best-Digital-Mixers-For-Church.png)
