Unless you work in a sound-treated recording studio, crafting professional sounding mixes can be a difficult task.
If you’re a bedroom producer, you’re probably using an untreated room, improper speaker placement, and space with poor acoustics.
These unideal mixing environments lead to the classic “car mix” experience: you spend countless hours in the DAW and your mix sounds perfect.
Then you test it in the car and contemplate tossing your laptop into the trash and quitting altogether.
Without a guide for your mixes, you run the risk of creating tracks that sound killer in your bedroom, but nowhere else.
Fear not. You don’t need to spend your life’s savings to create a professional home studio (but if you can, I say go for it!).
You can actually craft excellent mixdowns using readily available tools!
Enter our heroes: reference tracks…
Disclosure: This post may contain affiliate links, which means we may receive a commission if you click a link and purchase something that we recommended. Read more about Affiliate disclosure here.
Table of Contents
What are Reference Tracks?
Reference Tracks are songs used as a rubric for your mixes, a standard to compare your music with.
Music is never produced in a vacuum; we are influenced by songs that already exist. An original track is merely a collage of ideas and sounds you’ve heard over the years.
This is particularly true during mixing and mastering. Most producers aren’t seeking to create an original mix; they want to emulate professional quality songs, matching their energy, tonality, and loudness.
Reference tracks will improve your music by comparing your song to professional mixdowns during the editing process.
They’ll help you identify problem areas and make appropriate changes so your mix sounds as good as possible.
How To Pick Reference Tracks
Ideal references are often songs in a similar genre to your track. If you were inspired by a particular song, it may be the best reference!
Have two or three solid references. Your track isn’t a carbon-copy of another song, so gathering a handful of sources is beneficial for analyzing different musical aspects.
Too few references, and you’ll get discouraged that your track doesn’t sound exactly like them. Too many, and you’ll be spread thin trying to accommodate so many different sounds.
Now, you have selected two or three tracks that you will use as your mixing benchmark, trying to match their sound and structure to the best of your abilities.
What Tools Do I Need?
Trained Ears: To get the most out of your reference tracks, you should have an adequate ability to pick out frequencies in a mix.
If you’re inexperienced in this area, I recommend using ear training resources first, as this skill alone will improve your mixing overnight.
Spectrum Analyzer: Your ears can only pick up a specific range of frequencies. Some high-end fizz (16k+) and low-end rumble (20hz and below) will only be noticeable with a visual readout. While you won’t be able to hear it, these frequencies add volume and clutter to your mixes. You need to analyze all the sounds affecting your tracks, not just the audible ones.
Your sound system may not be able to pick up certain frequencies either. For example, if you’re mixing on headphones, it can prove difficult to accurately gauge your low-end.
The wise saying is, “if you can’t hear it, you can’t mix it.”
A spectrum analyzer allows you to “cheat” and see what your ears can’t pick up. More importantly, it gives you visual information for side-by-side track comparison.
While you shouldn’t rely solely on a visual readout (always trust your ears), it can speed up decision-making and identify problem areas quicker.
Your DAW likely comes with a spectrum analyzer or metering utility. Alternatively, use a graphic EQ to see the frequency spectrum. However, an EQ may not give detailed information about volume, phase correlation, etc.
Comparison Tools: Third Party plug-ins exist that allow you to compare your mix to your reference tracks seamlessly. While they aren’t necessary, picking up a comparison plug-in might make your workflow simpler.
Tips Before Starting

Don’t skip these steps! You risk wasting time and hurting your mixes!
Match Your Levels
Our ears are easily deceived; louder usually sounds better. If we mix a track at both a high and low volume, we’ll favor the high volume mix every time.
The problem is that you’re comparing a fully mastered reference track to your rough, unmastered mix. Your mixes will be quieter and your ears won’t accurately make out the differences.
If you want to effectively use reference tracks, level matching is crucial. This does not mean matching the tracks’ peak volumes, but their perceived loudness, measured in LUFS.
Once your tracks sit comfortably at a similar LUFS volume, then you’ll be perceiving each track at equal loudness, helping you to reference more objectively.
Be Realistic
You can’t be perfect. Don’t forget this.
If you’re new to producing, you can’t realistically expect to sound like artists with decades of experience, professional studios, and a mastering engineer. You’re trying to do the best you can within your bedroom.
Don’t hold yourself to an unrealistic standard. At the same time, strive to sound like that ideal mix. If you’re getting close, you’re on the right path.
Be Intentional
Know what you’re trying to learn from your reference tracks. The more experienced you are, the more specific you can become.
Pick sections of a song you’re trying to emulate. Here are a few examples to get started:
I want my sub bass to be as loud as my reference
I want my vocals to sound exactly like my reference
I want my high end to match my reference
I want my drums to sound as compressed as my reference
Intentionality speeds up the process, allowing you to quickly diagnose problems and not get overwhelmed.
Be Specific
Each reference should have a quality you’re aspiring to imitate.
Maybe one reference focuses on the arrangement of instruments, how “full” a track feels. Another may be for comparing loudness, or for studying how distorted your drums should sound.
With reference specificity, you will know exactly each track’s purpose. You won’t get distracted with comparing song aspects that you’re not interested in copying.
Don’t despair if your mix doesn’t accurately match your track! Don’t lose sight of each reference track’s job.
The House of Kush provides thoughtful insight on the issue of specificity and identifying problem areas. I encourage you to check out his video on the subject.
How to use reference tracks

Now it’s time to get started comparing your mix with your references tracks.
Be strategic. Start with narrow, specific mixing decisions and then move to broader ones. Sometimes tackling the small problems first will make bigger problems disappear.
For example, don’t listen to your reference and immediately make EQ changes on your master bus. If you can pinpoint what’s causing the poor mix, you can dive into the DAW and cut the problem at the root.
Frequency Spectrum
The most common function of reference tracks is for comparing the frequencies of your tracks.
Open up a spectrum analyzer or a visual EQ. Then, switch between playing your mix and your designated reference mix and begin investigating!
Here are a few things you can study:
Instrument Placement
You can use a reference track and an EQ band to isolate certain frequencies in the reference mix.
For example, let’s suppose you want to find what frequencies the snare drum occupies in your reference.
In your EQ, create a narrow peak and sweep through the frequency spectrum to find out where the body of the snare hits and what other frequencies sit along with it.
You can replicate this process with the kick, bass, synths, guitar, vocals, or whatever!
By isolating frequency bands, you can compare your mix and see where your instruments sit. While it won’t be a perfect comparison, it will help you make better EQ decisions throughout your mixing process.
You may find that your reference’s snare doesn’t need as much high end, so you can mix your track’s snare accordingly.
By analyzing the higher frequencies of your reference, you may find that its only occupied by cymbals and white noise.
When you look at your track, you realize that your guitar’s high end is clashing with your cymbals.
You may decide to carve out space for your cymbals to match the spaces of your reference.
Identifying instruments placement is a great practice at the start of a mixdown; it provides a blueprint of where instruments ought to fill space. This will inform your EQ decisions and demystify your mixing process.
After you have started your mixdown, continually look at your reference, double checking that you’re moving in the right direction.
Frequency Balance
If you don’t have a treated studio, comparing your frequency balance to your reference’s will help you see the problems separating you from a professional quality mix.
Simply switch between your tracks and study the visual frequency spectrum. Use your ears to hear the differences.
You may immediately notice problems. Maybe your track has too much bass, not enough mid-range, or too much high end. Your reference will tune your ears to what an ideal mix sounds like on your sound system.
Try to pinpoint visually where the entire mix differs. Perhaps your reference has significantly less energy in the 12k+ range. Your track may have a huge boost in the mids where your reference does not.
This process is helpful when making mastering EQ decisions or for a final mix check. By testing your mix periodically to a reference, you’ll hear if your frequency balance is matching your goal.
Loudness
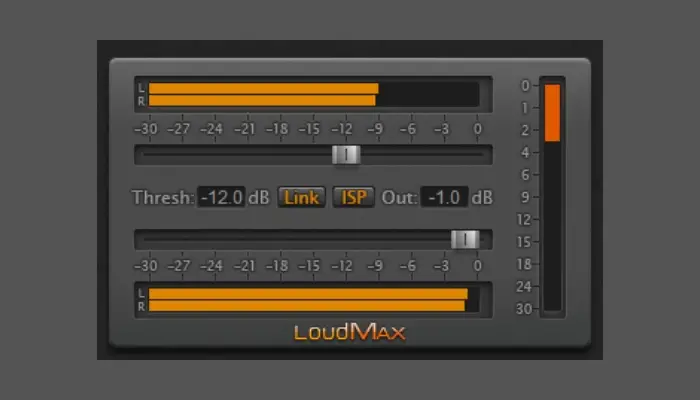
Loudness is a common problem for beginner producers. They export their tracks, eagerly upload them to Soundcloud, and realize their mixes sound quiet compared to professional ones.
Using reference tracks won’t solve the loudness issue in its entirety, but they’ll allow you to gauge your perceived loudness vs. your reference.
Comparing track loudness is best during the mastering phase. You’ll get better insight to how your volumes compare than with an unmastered mix.
Using a metering tool, check to see the difference in LUFS. See if your track is relatively close in volume. If you’re not hitting those ideal levels, go back and review your mixing decisions, as the majority of loudness issues are caused by a poorly crafted mix.
You may have too much low end which prevents you from boosting your gain on the master limiter.
Maybe your vocals are too loud, and you can’t boost your gain without distorting them. You can repeat the previous EQ and frequency balance steps and until you get your desired levels.
Loudness doesn’t necessarily equal a better mix, but depending on your genre’s conventions, you’ll want to make sure you’re at least close in volume.
A reference track will provide a benchmark so that you won’t get discouraged when you upload your track.
Mono/Stereo Compatibility
Often overlooked, analyzing mono and stereo compatibility can make or break your track on certain sound systems.
Play your reference in mono by using a utility or stereo plug-in that allows you to convert tracks into a mono signal. Notice which elements stay prominent in the mix and which disappear.
Now repeat the process with your mix. Do the same elements remain in mono? Does too much or too little disappear in mono?
This prevents your mixes from disappearing on a mono sound source and ensures that your mixes are as wide as your references.
Once you identify problem areas, go back into the mix and make adjustments on which instruments should stay in mono, which needs more stereo widening, etc.
Wrapping it Up
Using reference tracks will save you time, train your ears, and maximize your sound system to create the best mixes possible.
By using references, you’ll make more tracks that you’re proud of and hone your ability to mix excellent music.
You may also like,