Do you want to know what vocal recording techniques and secrets pros use in their recordings to get excellent vocal quality? Then read this guide till the end.
The toughest part of audio recording is recording vocals in the right way.
Especially when you have a home studio and are a newbie recordist, it’s very obvious to get stuck with some compromised vocal tracks due to a lack of knowledge on how to record perfect vocals.
Well, don’t worry, I’m here today with some vocal recording techniques and secrets.
This is a step-by-step guide from perfect mic placement techniques to recording vocals like a pro.
In the next 7 minutes, you will become a master of vocal recording.
Vocal Recording Techniques and Secrets for Home Studios
There are several tips and techniques professional recordists use to record vocals. In this guide, you will go through all those techniques that make the vocals sound like a Hollywood mix.
And of course, you don’t need any costly equipment to record that kind of vocals.
Although there are some necessary equipments which you should buy if you wanna a great vocal track. Don’t worry, these accessories don’t cost you much.
But if you add these to your recording accessories, and take care of the secret vocal recording techniques and secrets that I’m going to provide you in this article, you will definitely end up with a great vocal track.
Now it’s time to jump into the business.
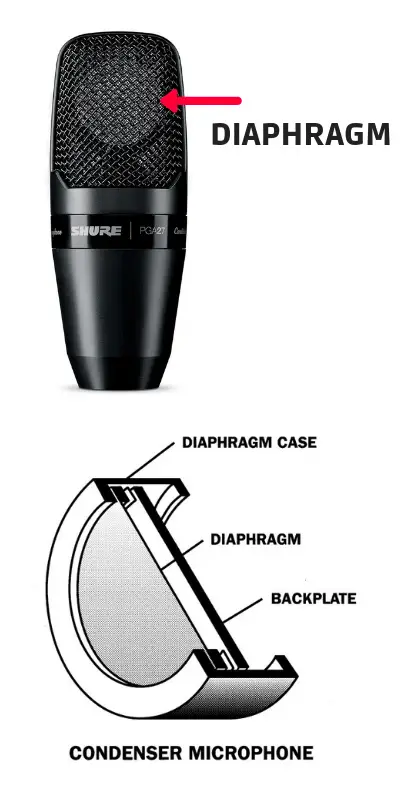
Use large-diaphragm microphones
First things first.
Well, to record any kind of vocals, you definitely need a microphone. Right? But wait.
Do you have the right type of microphone that could capture a more dynamic frequency range of the vocals?
If not, then you need one. Especially a large diaphragm condenser microphone.
So, why do I suggest you have a large-diaphragm microphone?
Large diaphragm condenser mics are more sensitive to sound sources.
They have a more dynamic range, a wider frequency range, and a more pronounced proximity effect.
In this article, I will also give brief details on the PROXIMITY EFFECT.
There are many advantages to having a good condenser microphone with a large diaphragm, so the 1st step is to buy a perfect condenser microphone.
There are no minimum size recommendations for condenser mic diaphragms.
Just keep in mind that big diaphragm condenser mics are more sensitive.
One more thing you should keep in mind – As large diaphragm condensers are more sensitive to sound sources, you should have a more soundproof room with large diaphragm condenser mics
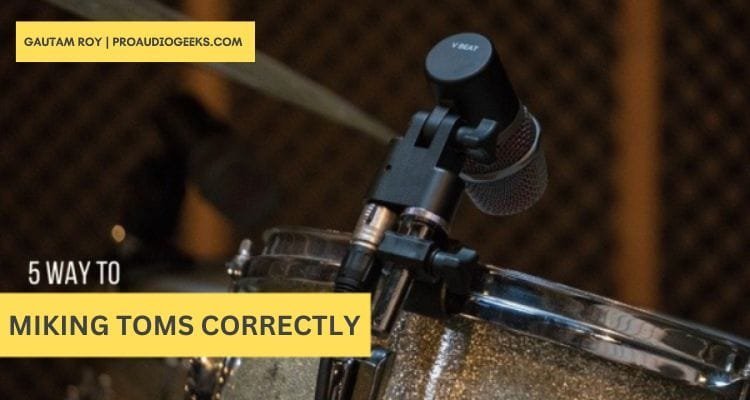
Mic placement for vocals
The 2nd thing you should be aware of is proper mic placement. As you know, condenser microphones are too sensitive to the sound source.
If the mic is so close to the mouth of the singer, you will probably end up with an over-optimized voice.
The positioning angle of a condenser mic also affects a lot to the input.
If the angle and the polarity are not perfect for the vocal, the force in the vocal can be compromised. Let’s see the image.
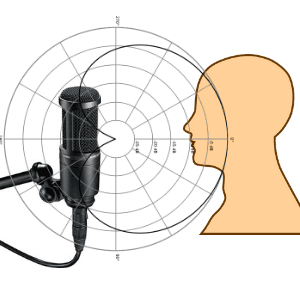
Here you can see the vocalist is 10-15 centimeters away from the condenser mic so that he is falling under the cardioid pattern field of the mic.
You can refer to the datasheet of your condenser mic to know the exact distance.
You have to read carefully the cardioid pattern of your mic to address the correct distance of your vocalist recommended by your mic manufacturer.
As well as make sure your singer is straight to the mic and there is no inclination to the angle so that the mic could capture the maximum amount of the sound.
A condenser mic is very sensitive to the polarity.
If the singer turns his face left-right, up-down, then it affects a lot on the dynamics of the vocal.
So instruct your singer to keep his face straight to the mic for wide dynamics.
Mic Settings for Vocal Recording
Some condenser microphones have pads and low-cut switches. Some high-end condenser mics have also polar pattern-changing switches.
You have to be aware of the functions of these tiny switches.
Let’s have a look at these switches.
Polar pattern switch
Solo vocals are captured mostly in the Cardioid polar pattern. If your mic has a polar pattern switch, then set it to the Cardioid pattern.
In other patterns, it could capture background vocals also.
Low-cut switch
A low-cut switch is used to cut the low end in the frequency range.
See the image below.
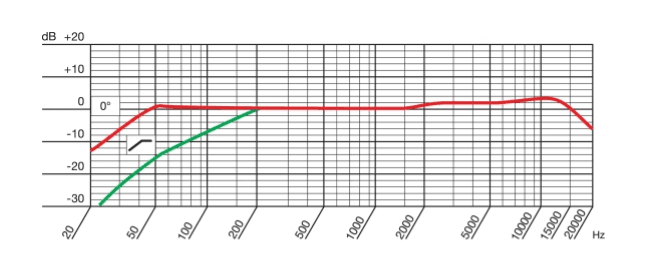
Here, the green line shows the low-cut switch applied, and the red line is without the low-cut.
A low-cut switch is very important for home studios.
Low-frequency sound carries more energy, hence it can not diffuse by normal soundproof techniques.
Especially in home studios which are not properly soundproofed, these low-frequency sounds also record down to your condenser microphone during the session.
As a result, you get a background noise in your audio.
If your mic has the low-cut filter, then you can use it to cut down the low-frequency background noise.
But keep in mind that cutting down the low end can also affect the vocals.
If your vocalist is male, then he has the voice down to the frequency which cut out by the filter. The end goal is to own a properly soundproofed room to get a good sound without applying this filter.
Pad Switch
The pad switch is used to cut down the intensity to a certain level. Some mics have this feature to capture loud sound sources. Although for vocals, I suggest not applying a pad.
It’s used for high-volume sound sources like drums etc to save your mics’ diaphragm from high SPL volumes.
The importance of Mic stand
A mic stand plays an important role in vocals.
Don’t use crappy and noisy mic stands.
A condenser mic is very sensitive to noise and could capture your mic stand’s noise if shaken by your singer accidentally.
Another thing you should keep in mind is that only choose a mic stand with a shock mount, as it will absorb the shock if the singer accidentally shakes the mic during the session.
If you want to buy the best condenser mic stands, I recommend these mic stand to you…
Use soundproofing accessories
Using condenser microphones for vocals without proper soundproofing is like throwing a stone in the sky straight above your head.
When the stone comes back, it would give you an injury.
But soundproofing is actually a very costly process, and it’s an important factor that differs between professional studios from home studios.
Hopefully, there are many Cheap soundproofing processes available to record vocals like a pro studio.
microphone isolation shield
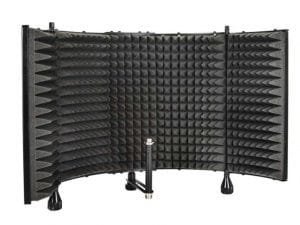
This is the most affordable option to stop background noise and the reflections of vocal.
Many successful home studio owners are using this to record the clean vocal.
You can own this accessory for only $50.
Checkout the latest price of Mic Isolation shield on Amazon.
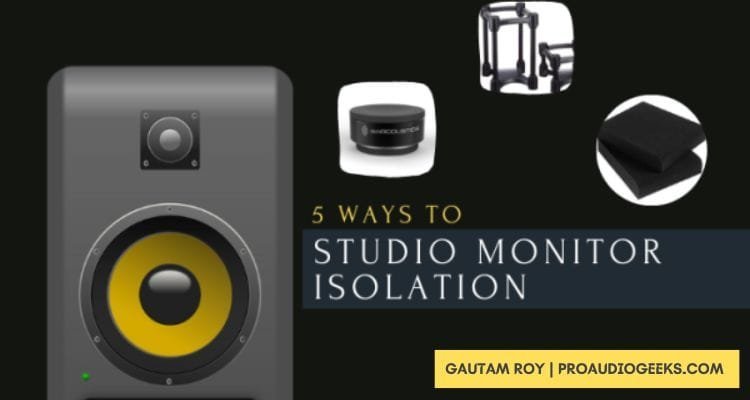
Soundproofing foam panels
The second but costly option is using soundproofing foam panels. You can use them to soundproof your vocal booth.
There are many sizes and shapes available for soundproofing foam panels. But I refer to the pyramid shape. There are 2 accessories in this category.
- Foam panels
- Bass trap
You have to use both to acquire the perfect soundproofing environment.
See this image for more information.

Checkout the best acoustic options here…
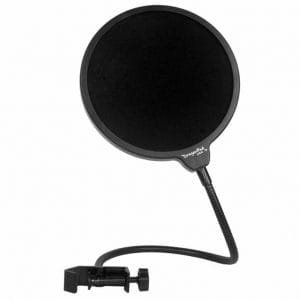
Use a pop filter to reduce the microphone popping sound
Condenser mics are very sensitive to certain words.
Whenever your singer used his lips to pronounce a word like Ph, Phh, or something like this, a pressure of air collides with the diaphragm of the mic.
As the diaphragm of the condenser mic is very sensitive, it also records that puffling sound along with the vocals. This puffling sound has more intensity than other words and possesses that part of the vocal.
To avoid that puffing sound, a pop filter is used. It is made of circular double-layered nets that scatter the extra air reaching the condenser mic.
It’s a must-have tool for your condenser mic.
Without this accessory, you can’t expect a perfect vocal session.
Here it is.
Pop filters are available for as low as $5 on Amazon. You can check out the whole range of pop filter on Amazon here.
Add depth using the Proximity effect
Proximity effect is an effect that adds depth to the vocal. If it’s used correctly, you will get more depth in vocal. This effect is especially found in condenser mics.
Although some dynamic mics also have this effect.
One of them is Shure SM58 a legendary dynamic microphone for vocals.
The level of proximity effect differs in all condenser mics.
The principle of work of proximity effect is – When the vocalist come close to the mic level of bass frequency increases and when he goes away from the mic the bass frequency level decreases.
A professional singer uses this feature to add extra depth at some points of the vocal by coming close to the mic.
Many new vocalists don’t know this feature of a condenser microphone, so guiding them to use this feature correctly to add depth to their vocals is extra beneficial for you.
Right mic levels to avoid clicking and distortion
A condenser mic is very sensitive equipment, and if you don’t properly adjust the input levels and pad switches to control the gain, you will end up with distorted sound with clipping.
First, come to the pad switch.
Many condenser microphones have a switch to control the input gain for high SPL applications.
Normally, this switch is not used with vocals as the vocals are not considered a much SPL sound source.
But in some genres of music like rock songs, the singer produces a very high-intensity voice, and if you record that voice without applying the pad switch, you will end up with a clipped and distorted vocal.
So I will advise you to use the pad switch to control gain when working in those genres.
The second most important control is the input gain control of your audio interface and mixer.
You have to properly adjust the input gain so that the input gain indicator shows somewhere between 3dB to -6dB in peak SPL.
You should request your vocalist to sing as loud as he can so that you can adjust the input gain control between 3dB to -6dB.
Right DAW track setting
Today, every studio converts to digital.
There are many advantages of migrating to digital recording.
The main advantage is that you can start your studio with just a computer, a DAW(digital audio workstation), and an audio interface.
But with the lack of knowledge of input, output, and applying effects in a proper series, newbie recordists will end up with low-quality mixing.
I would recommend that you gain some knowledge of tracking and effects, as well as input and outputs.
I would recommend you to read Modern Recording Techniques by David Miles Huber for a better understanding of tracking and applying effects
Bonus Tip – Use Pencil Method to reduce Sibilance in vocals
Very few people know this trick.
In low-end condenser microphones, sibilance is a common problem in the recording.
Sibilance is an effect like the popping effect.
The difference is that the popping effect occurs when we use our lips to pronounce PF, PFF, etc words, and the sibilance effect occurs when we pronounce SSHH, SH, THH or Zzz etc, words.
These words add a harshness to the upper-middle part of the frequency spectrum.
The popping effect can be stopped by using a pop filter, but there is no way to stop the sibilance effect except for this pencil method.

To use this effect, you need a pencil and a rubber band.
You have to tie the pencil to the middle portion of the diaphragm of your condenser microphone with the help of a rubber band.
When you tie the pencil-like this and record vocals, the direct force due to the pronunciation of SSHH, etc, words scatter and don’t hit the diaphragm.
The result will be a sibilance-free sweet vocal.
Conclusion: Vocal Recording Techniques and Secrets
Above you have read vocal recording techniques and secrets to record vocals like a pro in your home studio without spending a lot of money.
If you liked this article, share this with your social circle so that your fellow recordists can also take advantage of it.
If you have any question regarding this article, comment below.
I will try to answer your questions.
You may also like these articles,